Can a State Machine be a String?
Near the end of last year, I was doing prep work for my first workshop on state machines. In my research, I came across this simple, but effective graph editor: https://csacademy.com/app/graph_editor/.
I was impressed with how simple it was to represent a graph with just a few lines of text. On the left side of the web page, under “Graph Data”, is a simple text input. You generate the graph by writing nodes next to each other. The light bulb example I used in the previous post is written like this:
lit unlit
unlit lit
lit broken
unlit broken
Which generates this graph image:
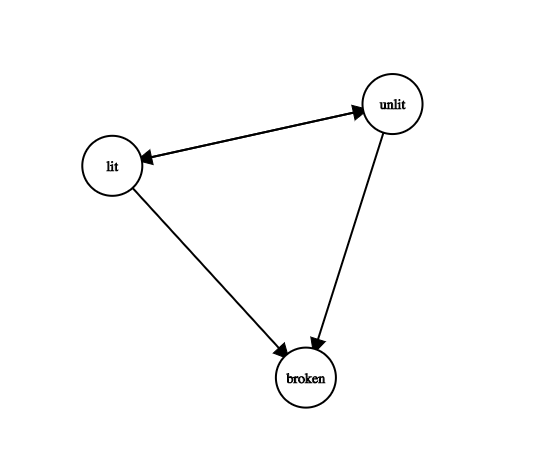
I was blown away. A graph can be represented simply as a string if you followed a few rules. This got me thinking, “Can I do the same for a state machine?” Turns out you can.
In order to represent a state machine as a string, we only need to make a couple adjustments.
- We need to be able to derive an
idfrom our string - We need to be able to indicate the
initialstate - We need to be able to indicate what
eventswill trigger transitions
Accomplishing the first two criteria was pretty simple: dedicate the first two lines of our string to id and initial respectively. With our light bulb example, it would look like this:
lightBulb
unlit
Adding the events required having a way to define an edge as an event type. I chose to accomplish the same way a weighted graph is represented as a string.
lit unlit TOGGLE
unlit lit TOGGLE
lit broken BREAK
unlit broken BREAK
Now, we need a function that will parse this text into a valid state machine. Let’s setup the skeleton of that function.
function statechart(string) {
return {} // We'll eventually return a valid statechart here.
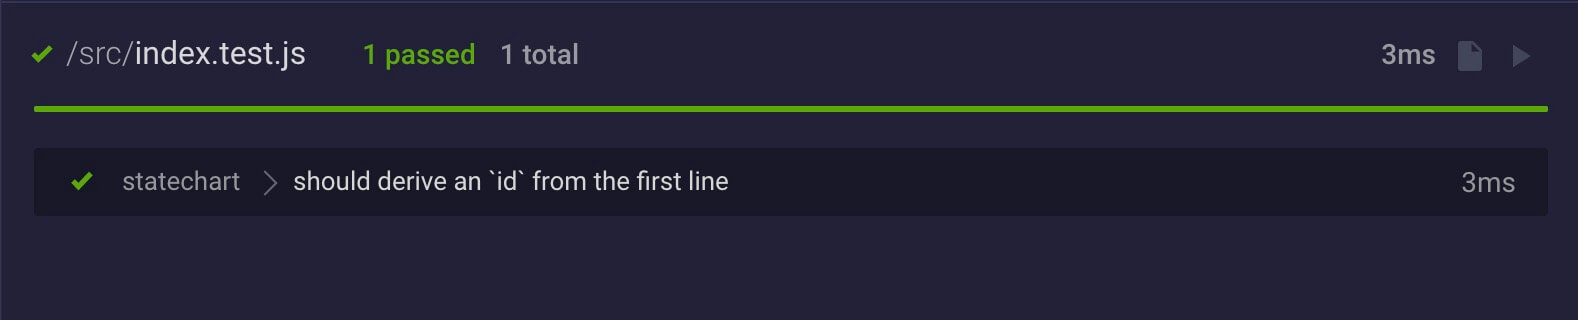
}Next, we should maybe write a couple tests to validate what we’re accomplishing. Let’s start with deriving the id.
describe('statechart', () => {
  it('should derive an `id` from the first line', () => {
    const chart = statechart(`
      lightBulb
    `)
    expect(chart.id).toEqual('lightBulb')
  })
})
This, of course, fails because we haven’t made any changes to the code to accomplish this. Let’s write the simplest thing we can to get the test passing.
function statechart(string) {
  const id = string.trim()

  return {
    id,
  }
}
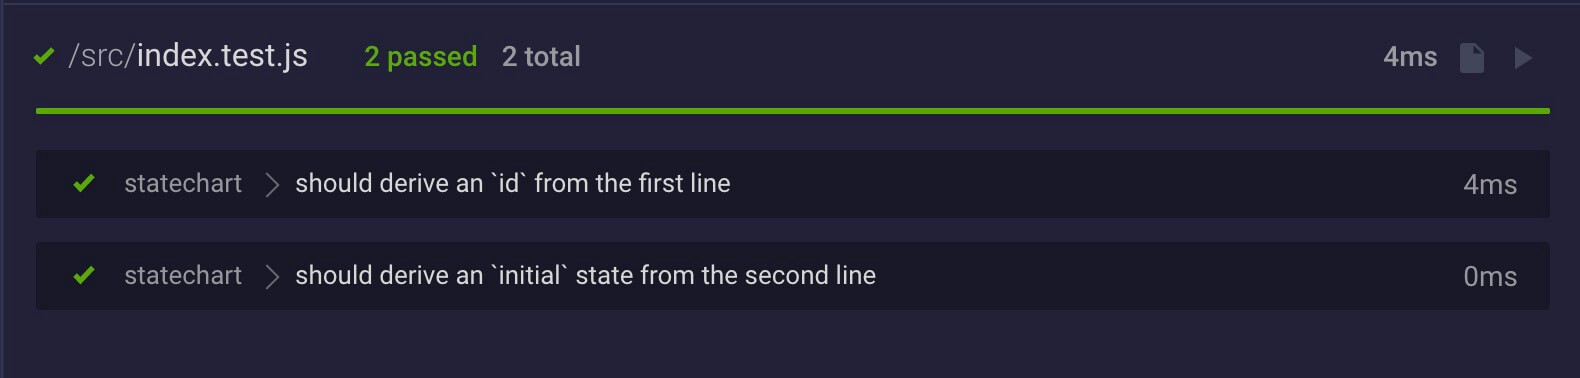
That passes. Now we can add a second test for the initial state.
describe('statechart', () => {
  // ...
  it('should derive an `initial` state from the second line', () => {
    const chart = statechart(`
      lightBulb
      unlit
    `)
    expect(chart.initial).toEqual('unlit')
  })
})
In order to get this test passing, we need to do something a bit more interesting. We need to split our string on new lines in order to separate the two items: id and initial state. We also need to trim those lines and get rid of the whitespace. Lastly, we want to filter out any empty strings.
function statechart(string) {
  const parsedString = string
    .split(/\n/)
    .map(s => s.trim())
    .filter(Boolean)
  const [id, initial] = parsedString

  return {
    id,
    initial,
  }
}
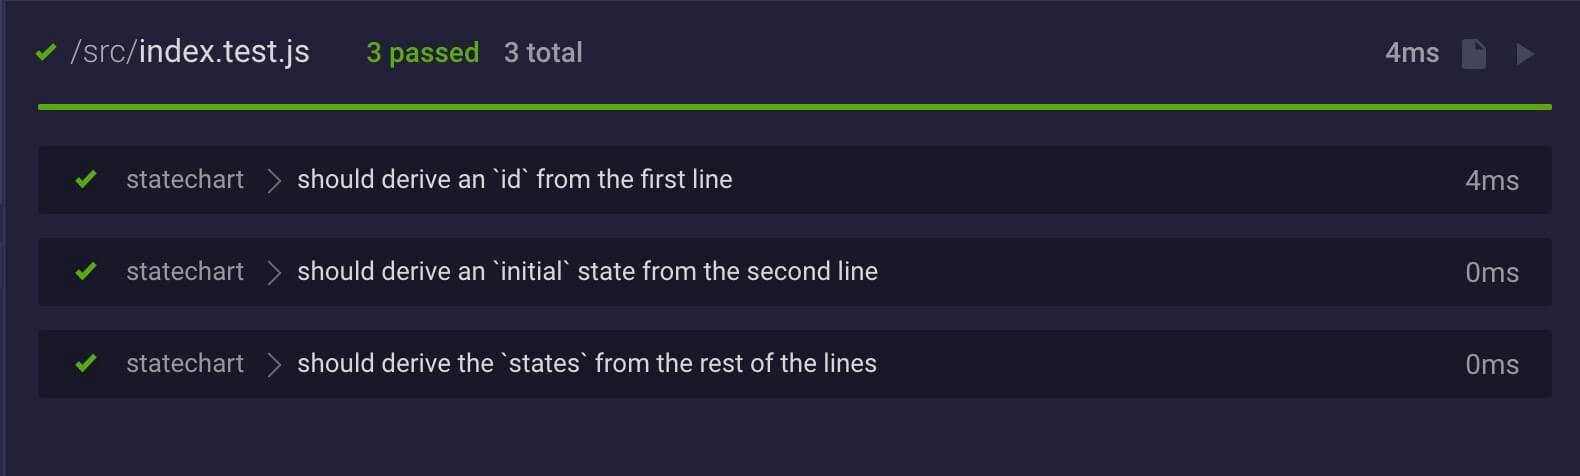
That passes, too. Now let’s go for it and add a test for handling our states.
describe('statechart', () => {
  //...
  it('should derive the `states` from the rest of the lines', () => {
    const chart = statechart(`
      lightBulb
      unlit
      lit unlit TOGGLE
      unlit lit TOGGLE
      lit broken BREAK
      unlit break BREAK
    `)

    expect(chart.states).toEqual({
      lit: {
        on: {
          TOGGLE: 'unlit',
          BREAK: 'broken',
        },
      },
      unlit: {
        on: {
          TOGGLE: 'lit',
          BREAK: 'broken',
        },
      },
      broken: {},
    })
  })
})
This is where the crux of the work takes place. We’ll start by collecting all the rest of the string into an array of stateStrings.
const [id, initial, ...stateStrings] = parsedStringFrom here, we need to turn these into stateNodes. We’re going to turn these into an array of objects with a start, end and event property. It’ll make things easier down the road.
const stateNodes = stateStrings
  .map(s => s.split(' '))
  .map(([start, end, event]) => ({
    start,
    end,
    event,
  }))
Now we have a map of these nodes, we need to reduce that down to a single states object.
function statechart(string) {
  // ...
  const states = stateNodes.reduce((acc, cur) => {
    const { start, end, event } = cur

    // check if this starting node is in `acc` yet
    if (!acc[start]) {
      acc[start] = {
        on: {},
      }
    }

    // check if the `end` is a state yet
    if (!acc[end]) {
      acc[end] = {}
    }

    // Add the event and transition here, spread any previous
    // [event]: end key/value pairs
    acc[start].on = {
      ...acc[start].on,
      [event]: end,
    }

    return acc
  }, {})

  return {
    id,
    initial,
    states,
  }
}
Sweet, this gets our tests all passing! Now we can try it out in a component.
import React from 'react'
import { Machine } from 'xstate'
import { useMachine } from '@xstate/react'
import statechart from './statechart'

const chart = statechart(`
lightBulb
unlit
lit unlit TOGGLE
unlit lit TOGGLE
lit broken BREAK
unlit broken BREAK
lit unlit RESET
broken unlit RESET
`)

const lightBulbMachine = Machine(chart)

function LightBulb() {
  const [state, send] = useMachine(lightBulbMachine)

  return (
    <div>
      State: {state}
      <div>
        <Button onClick={() => send('TOGGLE')}>Toggle</Button>
        <Button onClick={() => send('BREAK')}>Break</Button>
        <Button onClick={() => send('RESET')}>Reset</Button>
      </div>
    </div>
  )
}
And let’s check it out here:
If you want to see this code and play around with it, you can check out this Codesandbox: https://codesandbox.io/s/fsm-as-a-string-g3rcp
Drawbacks to This Approach
I hope it’s clear that this is simply an experiment. I don’t see this as a long-term useful solution. That said, I want to admit the many drawbacks that would happen from adopting this.
- No type safety with TypeScript or Flow
- No
guards for conditional logic - No hierarchical or parallel states
- No
actionsfor side effects - No ability to add top-level
events
Conclusion
I think this approach would really only be useful to someone who wanted to save a few keystrokes in building their machines. I wouldn’t recommend it to anyone!
But, I do recommend experimenting and seeing what you learn. My first iterations on this function involved using tagged templates and I learned a few things about writing those. It never hurts to spend some time trying something in a different way, and I hope this inspires you to try a few more experiments yourself.